Easy Voice Documentation
Getting Started
After downloading Easy Voice from the Unity Asset Store, import all files into your project. This can be done either from the Asset Store Download Manager and clicking Import or by going to the Unity menu Assets/Import Package/Custom Package… Be sure to import all items listed.
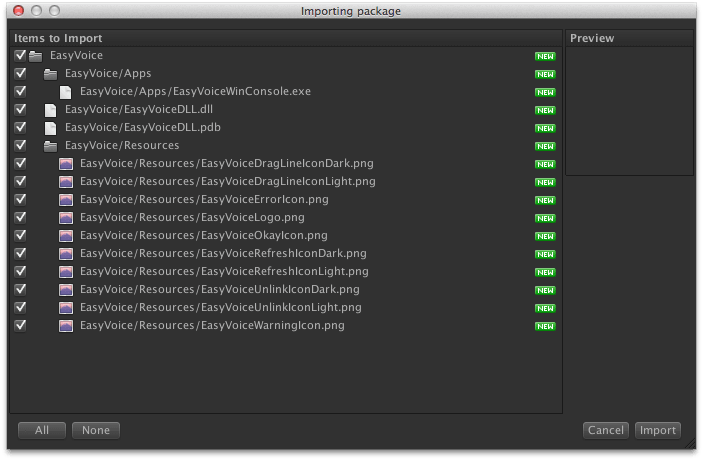
After this step is complete you will see an Easy Voice folder created under Assets in your Unity project window.
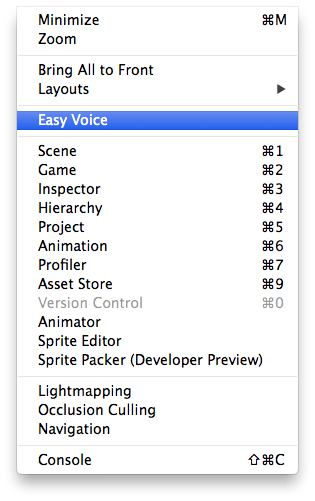
You can then access Easy Voice from the Window Menu.
Lines Panel
Easy Voice will open to the Lines Panel and is ready for you to begin entering your lines of dialogue or narration.
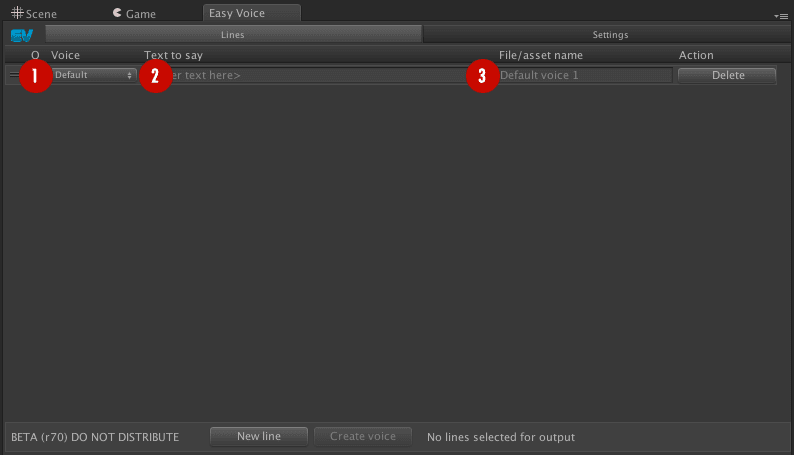
- Click the Voice dropdown to select from a list of system voices to read your line. Note: This list may vary based on the installed voices on your computer.
- Type the text you want speak to a voice file.
- Choose a name for the file to be saved, or use the default name.
Once you’ve entered in the voice lines you want to generate, you will see the Create voice button become enabled. Clicking it will create the voice lines.
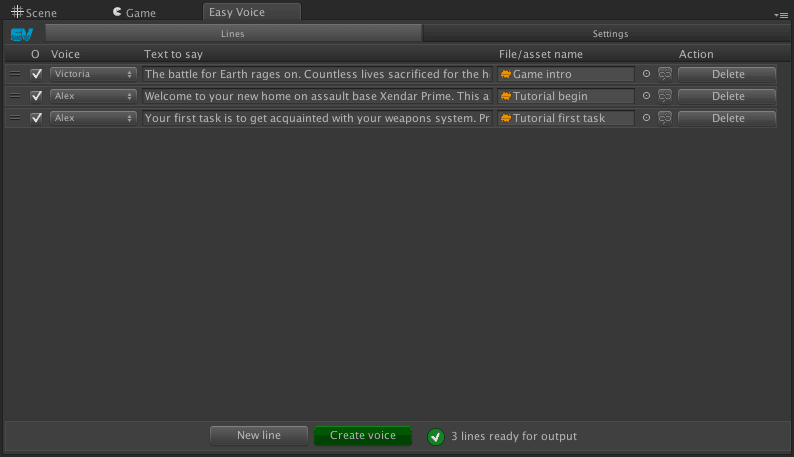
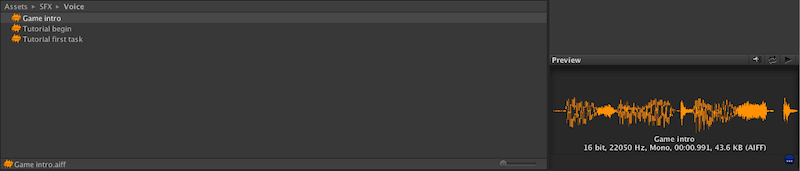
Once complete you will see the sound files created in your Assets\\SFX\\Voice folder by default. You can click on a sound to preview it in the Unity editor and begin using it in game.
Settings Panel
The Settings panel contains various configuration options for Easy Voice.
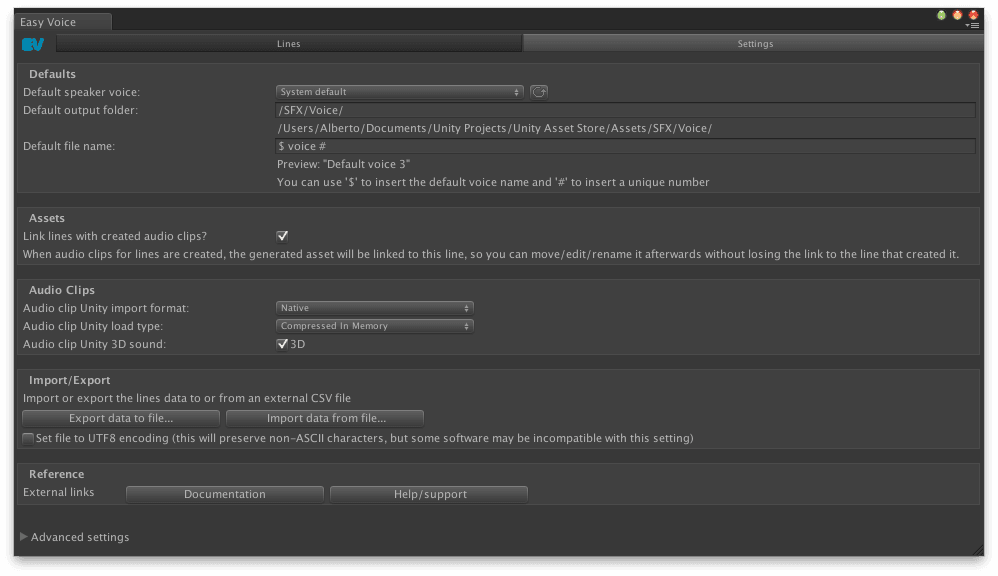
Defaults
Default speaker voice – Select from the available list of system voices to use as the default when creating new lines. Pressing the Refresh button will update the list in case new voices were added to the system while Easy Voice was running.
Default output folder – The directory where the voice files will be saved by default. If the directory specified does not exist it will be automatically created.
Default file name – The default filename for new lines created. You can use the symbol “$” to insert the name of the voice and “#” to insert a unique number.
Assets
Link lines with created audio clips – This setting is enabled by default and maintains a link between the Easy Voice line and the generated asset. Turning this off lets you create lines that are not linked to assets.
Audio Clips
These settings allow you to choose import preferences as described in Unity Audio Files.
Import/Export
This feature allows you to export CSV data for modification in spreadsheet or other applications and then bringing the updated file back into Easy Voice. If you are looking to create your lines in a spreadsheet, be sure to export the template first and work from that.
Export data to file – Creates a .CSV file with all Easy Voice lines data.
Import data from file – Loads a .CSV file into Easy Voice. This file must be in the same format as exported by Easy Voice. You will be prompted to either append to existing Easy Voice lines or overwrite existing lines.
Advanced Settings
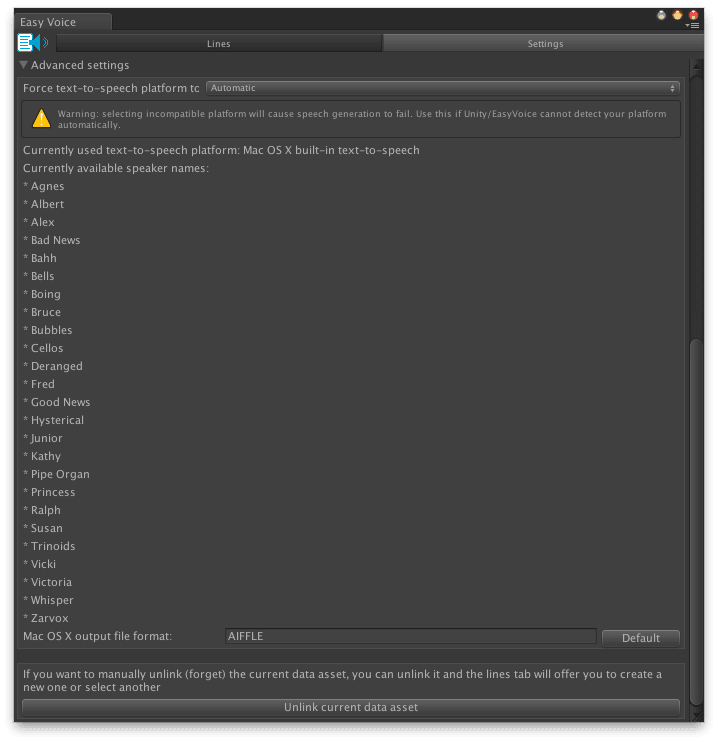 Force text to speech platform – Change from automatic platform detection to Windows or Mac. Please note this will cause errors if the wrong platform is selected.
Mac OS X output file format – If on a Mac you may modify the default file format as defined in Apple’s Speech Synthesizer ‘say’ command. Please note: Changing the audio file format may produce files that are not compatible with Unity.
Unlink current data asset – This option will “forget” the saved data file for Easy Voice and allow you to start fresh with a new data file or open an existing one. The existing data file will not be erased and can be re-linked.
Support
Have questions, comments, or feedback? Visit the Easy Voice support forum.